
With the reference plates set up I can use the topology lines as a guide to start creating my face. So select shapes, splines and line, make sure the initial and drag type are set at corner, and just create a quad using the guide lines. Next right click snaps toggle and only turn on vertex, by doing this make it easier for me to line up all the quads together.

Done
Attaching quads
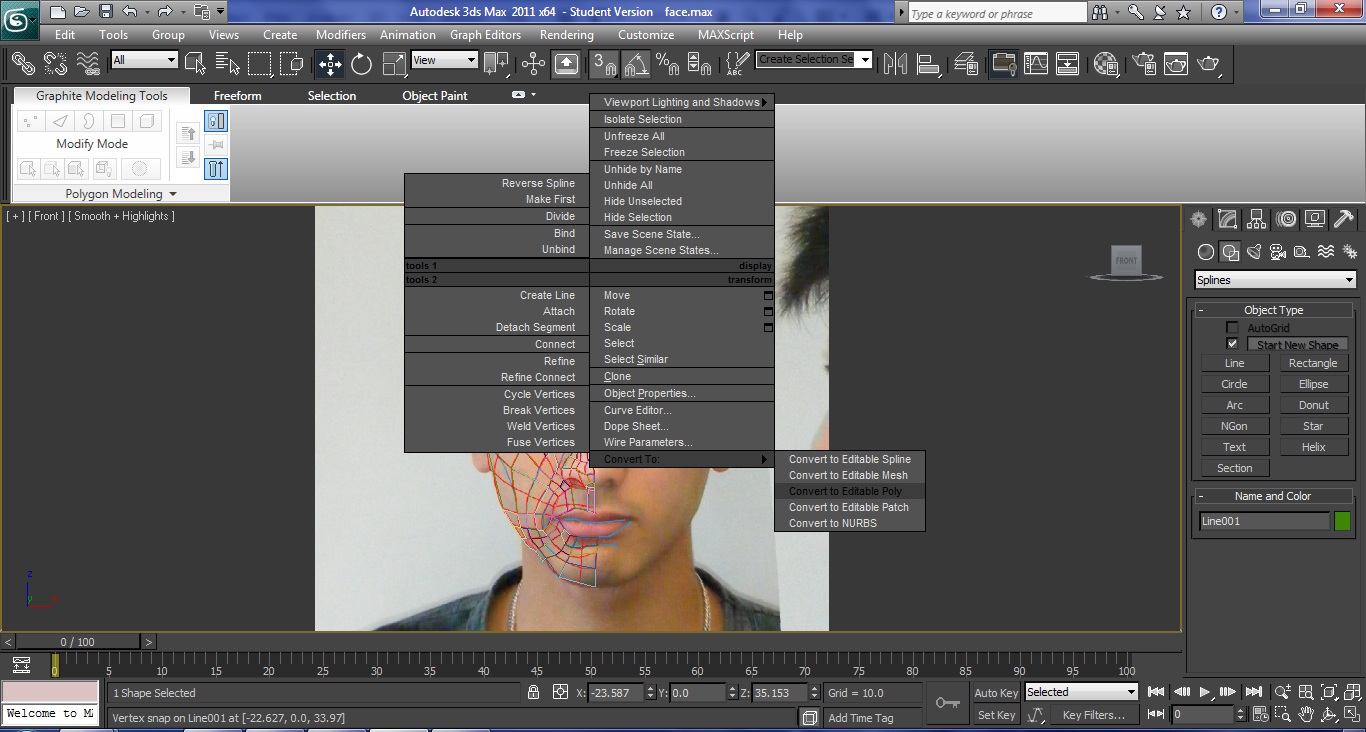
When I have created all the quads, I convert one of the quads into an editable poly.

At the modifier panel, scroll down to attach, click attach list and select all the lines, press attach. This automatically converts all the quads to editable poly.

Although they are attached together, the vertices are not joined together, to join all the vertices together, in the modifier panel select vertex and highlight all the vertices, click weld, setting. At the weld menu set the value to 0.01 and press ok.

Moving the vertices

Press alt x to turn the object see through, go to modifier panel, select vertex and at the front view select all the vertices that is at the far right edge, use the move tool to start dragging them out to meet with the edge of my face at the side view. By using the side view as a guide, I began to drag out the vertices one by one to form the shape of the face, such as the mouth and the eye are the part that need to be more focused on because I have to make sure the depth of the eye sockets are right, which I need to make sure some vertices come out more than others, so it looks like overlap from the side view.

Symmetry

After all the vertices have been dragged out, go to the modifier panel and from the drop down list, choose symmetry, to apply the mirror effect on the object. On the symmetry parameters click x and flip and select the plus sign that is next to symmetry and click mirror. This allows me to move the left face around, so the two sides can fit together without overlapping each other.


After symmetry has been applied, I can see how my whole face will look when it is smooth. Firstly turn on Use NURMS Subdivision and see if the face is smooth enough, if not just turn on the vertex mode and change it manually.

Turn off Use NURMS Subdivision and from the modifier list choose TurboSmooth.


