Thursday, 8 December 2011

Sofa


 Using the reference image, an box is created and converted to editable poly, extrude is then used to create new set of polygon and vertex mood are selected to change the change of the polygon.   


Bevel are then used for the sit area to add in detail.


For the material, polygon: material are used to set ID's to the faces, so they can have different bitmap material on them, with multi/sub object. An extra box is then created to be the sit and attach to the sofa,  turbosmooth is then applied. 


Copy and paste the sofa, delete one side of the polygon as shown below. 


Apply symmetry.

Sunday, 27 November 2011

Radio


A box was created by using the reference image as a guide, convert it to editable poly, the corner was then smoothed using chafmer. Use swift loop to create new set of vertices, the front faces of the model are then selected by using polygon selection and extrude the faces inward to create the depth of the radio.


I have decided to use the reference image for the material of the radio. Open the reference image in Photoshop, delete the part that I dont want, lens correction was then used to make the image center.  


Transform warp was then applied to straighten the side, I then add in some wood material and save the file as radio.psd.


Open material editor and use the radio.psd file, assign it to the model. Unwary UVW was then applied to fix any stretch, by using planar, align.   


The wire at the back was created using cylinder, converted to editable poly and moving the vertex to create the curve effect.

Omni light and a glass material was then applied, so it look like the radio is light up when is turn on.

Compass


Using the reference image as a guide, create a cylinder for the handle, convert to editable poly and turn on polygon selection and select the top of the cylinder then use bevel to create the curve in shape at the top, for the bottom I have use inset and extrude to create a thinner cylinder. 


Create a thin box and convert to editable poly,  turn on polygon selection and use extrude to create new set of polygon and use vertex mode to create the slightly curved in end. Two more boxes was then created for the body.  


Another box was then created and convert to editable poly, turn on polygon selection and select the edges of the front side, then extrude a new set of polygon. Switch to vertex mode and move the vertices back, to create a pointed curve shape and by using edge mode, chamfer, to smooth out the corner. symmetry was then applied to finish the model.


For the pointed part, I have simply created a cone and clone it.


Open material editor, at the map panel apply raytrace at refection to create the metal effect and assign it to the model.

Chair


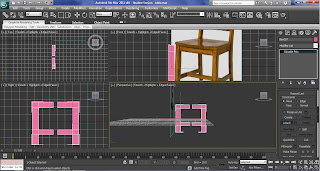
Import the chair reference image and assign it to a plane, create a box for the leg and convert to editable poly. Click polygon selection, swift loop was then selected to create new set of vertices, click extrude setting and highlight the faces that need to be extrude.
Hold down shift and drag, to copy the leg model, select mirror, so the back leg is created, attach and weld was then selected, to join the front and back legs together. 


Using the same method of creating the legs, turn on swift loop to create vertices and extrude to create the back and the middle of the chair.


Apply symmetry from the modifier list, click flip. Inside symmetry select  mirror, in order to move the symmetry side of the chair closer.


Create a box for the seat, convert the chair to edit poly, and attach the seat with the whole chair. Turbo smooth was then applied, to smooth the chair, to create a smooth result that I want, I have used a new technique call smoothing groups, from the modifier panel, select polygon and highlight the faces that i don't want to smooth, and at the polygon smoothing groups panel, select a number that is different from the faces around it, because only the faces that have the same number will smooth together. After I have change the number of the smoothing groups, at the turbo smooth panel tick smoothing groups, to turn on the result. 
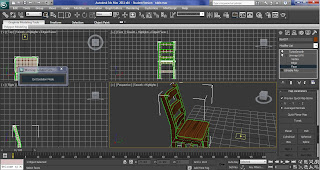


For the material I have decided to use a wood material, at the material editor, choose the wood bitmap and assign it to the model. Unwrap UVW was then applied to fix any stretch material, select face to highlight the part which are stretched and use planar, align to fix the problem.


New technique smoothing groups.


Monday, 7 November 2011

Table & ruler


Create a plane and use the material editor to import the reference image. At the front view, create a box and use swift loop create extra edges, so making it easier to extrude different part, than use symmetry, attach and weld to create the bottom part of the table.     


For the top, I create another box and same as making the legs. I have use swift loop, extrude and brevel. 


Chamfer have also been use to smooth the edges. Attach and weld the top of the table to the legs and apply a wood material to the table.


From the modifier list apply unwrap UVW to fix the stretch.
For the ruler, I just create a box and apply the ruler material on it.

Reichel bravssard
Drafting table
2009
http://www.copycatchic.com/2009/10/drafting-tables.html
[Internet]
[5/11/2011]

Ms Sunny Sun
12 inch/ 18 inch Wooden ruler
2010
http://www.alibaba.com/product-gs/293609546/12_inch_18_inch_Wooden_Ruler.html
[Internet]
[5/11/2011]


Architect Plans

Architect Plans


Finchingfield Guildhall Trust
gallery
2010
http://www.finchingfieldguildhall.org.uk/gallery.html
[Internet]
[24/10/2011]
 
Finchingfield Guildhall
Photos
2010
http://www.facebook.com/finchguildhall
[Internet]
[24/10/2011] 

Monday, 24 October 2011

Slice

Create a box and inside the box create a teapot and torus, apply slice to the box from the modifier list, click on the plus sign next to slice and select slice plane. Use the move and rotate tool to drag the slice plane.
To change material with this modifier, I created a sphere and apply a blue material, right click on the sphere and select clone, apply a red material and slice on to the new sphere, click remove bottom from the slice parameters, and use the move tool to drag the slice plane.