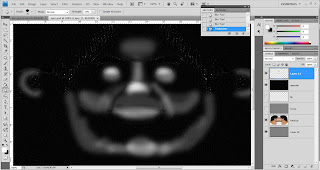
In Photoshop copy and paste the bump map layer and name is specular, click image, adjustments and select level, drag the taps, so the image goes black.
Create a new layer and select the brush tool, set lighten for the mode, low opacity and choose the brush size I want, then just draw on the areas that will be more shiny then the other.
After I have finished with drawing on the face, I select filter, blur and choose Gaussian blur, then choose the value so the lines will blend in with each other.
If some parts are too shiny, I can just use the lasso tool to select the area I want, click image, adjustments and select brightness/ contrast and just turn the brightness down.
Just use the blur to clean up the edge of the modify part and save as spec.psd.
Go back to 3d max and at the map panel, click specular level and open bitmap, choose spec.psd.
Back to Photoshop, click filter, texture and texturizer, change value of the scale and relief and press ok.

After texturizer.


No comments:
Post a Comment